

Cassini TIMs can be diagnosed and calibrated with the Saturn application. Follow the steps below to perform a full system Cal. First run Diagnostics to collect the "before" data and report any failures to RI Support for review prior to Calibration. Once the TIMs are confirmed functional, perform the Calibration. After the calibration procedure is completed, run Diagnostics a final time to collect the "after" data.
Related Documents:
- Updating Coefficients of Standards used in a Cal Kit Definition on Cassini https://roos.com/docs/RBEH-8K525N?Open
- Exporting Cassini Calibration Data for Certification or Analysis https://roos.com/docs/RBEH-C6DKWY?Open
Requirements:
- Cassini Calibration Kit (Power Meter, DMM, etc.) appropriate for the Cassini TIMs
- Cassini Diag Kit (Configuration Specific) with Diag/Cal Interface Plate, Adapters and Cables (configuration specific)
- Cassini Fixture
To Diagnose Fixture with Saturn:
- Launch Saturn and wait for "Tester Loaded." shown in the message window. Start a 20 minute timer to allow instruments to warm up.
- If the Fixture is latched, then it will be activated automatically at startup. If it is not latched, latch the Fixture if it is not yet attached. From Saturn app, choose apps > cassini, select equipment and choose Launch app form the right mouse button menu. From the equipment menu, choose
- From the equip pool window, choose refresh from the right mouse button menu. From Saturn app, choose apps > browse tester and confirm the Fixture is listed.
- From Saturn app, choose apps > cassini, select cal exec and choose Launch App from the right mouse button menu.
- Choose File > Diag List and select the appropriate system Diag list (likely "ACME Fixture Rev A").
- Select each service plan (CTL+A or CTL+left mouse button click) and choose choose Run Selected from the right mouse button menu. Remember to choose Actions > Results and Data > Save Csv to record the changes for future analysis.
- If any FAIL results are found, follow the steps below to Send Diagnose Results to [email protected]. If all results PASS, proceed To Calibrate NG Cart with Saturn below.
- Close the cal exec window.
To Calibrate Fixture with Saturn:
- Follow the steps to Diagnose Fixture with Saturn above.
- Choose Apps > Cassini, select Fixture Cal Exec and choose Launch App from the right mouse button menu.
- Choose File > Load Cal Kit and choose the appropriate entry. RiCalKit naming convention sets the date as the last valid cal date and should be checked if in the past. The Cal Kit contains the Open Coefficients and Noise Source ENR table and should be valid. (See Updating Coefficients of Standards used in a Cal Kit Definition on Cassini https://roos.com/docs/RBEH-8K525N?Open)
- Choose between 2 and 6 Cal and Validate pairs by holding CTL and clicking on each entry.
- Choose Run Selected from the right mouse button menu.
- Follow the user prompts. These often require connecting PKZ#12 adapters to either a Power Sensor, SMA cable, and OSL standards. (See Figure 1 and Figure 2)
IMPORTANT: ALWAYS follow good RF connector hygiene and use a SMA Torque wrench when tightening and avoid rotating the inner cable, ALWAYS rotate the outer nut. - Repeat until the list is completed. Cal data is ONLY saved after every successful validate. If a validate fails, repeat all selected Cal plans.
- Follow the steps to Diagnose Fixture with Saturn above (steps 8-10) to document the "after" values.
To Diagnose Cassini with Saturn:
- Launch Saturn and wait for "Tester Loaded." shown in the message window. Start a 20 minute timer to allow instruments to warm up.
- Unlatch the Fixture if it is attached and Latch the Diag/Cal Interface plate (see Diagnostic Kit).
- From Saturn app, choose apps > cassini, select equipment and choose Launch app form the right mouse button menu.
- From the equip pool window, choose refresh from the right mouse button menu.
- From Saturn app, choose apps > browse tester and confirm the Fixture is similar to "ACME bottomplate ##"
- From Saturn app, choose apps > cassini, select cal exec and choose Launch App from the right mouse button menu.
- Choose File > Diag List and select the appropriate Diag list (likely "Acme Rev A").
- Select ALL service plans (CTL+A or CTL+left mouse button click) and choose choose Run Selected from the right mouse button menu.
- If any FAIL results are found, follow the steps below to Send Diagnose Results to [email protected]. If all results PASS, proceed To Calibrate Cassini 16 with Saturn below.
- Close the cal exec window.
To Calibrate Cassini with Saturn:
- Follow the steps to Diagnose Cassini 16 with Saturn above.
- Choose Apps > Cassini, select Cal Exec and choose Launch App from the right mouse button menu.
- Choose File > Load Cal Kit and choose the appropriate entry. RiCalKit naming convention sets the date as the last valid cal date and should be checked if in the past. The Cal Kit contains the Open Coefficients and Noise Source ENR table and should be valid. (See Updating Coefficients of Standards used in a Cal Kit Definition on Cassini https://roos.com/docs/RBEH-8K525N?Open)
- Choose File > Calibration List and select the appropriate entry (likely "Acme Cal List Rev A")
- Choose between 2 and 6 Cal and Validate pairs by holding CTL and clicking on each entry.
- Choose Run Selected from the right mouse button menu.
- Follow the user prompts. These often require connecting PKZ#12 adapters to either a Power Sensor, SMA cable, and OSL standards. (See Figure 1 and Figure 2)
IMPORTANT: ALWAYS follow good RF connector hygiene and use a SMA Torque wrench when tightening and avoid rotating the inner cable, ALWAYS rotate the outer nut. - Repeat until the list is completed. Cal data is ONLY saved after every successful validate. If a validate fails, repeat all selected Cal plans.
- Follow the steps to Diagnose Cassini 16 above (steps 8-10) to document the "after" values.
- Record the model and serial numbers of the instruments along with last cal and next cal dates and generate a Calibration Certificate that includes the next scheduled Cal Due date in 12 months.
(See Exporting Cassini Calibration Data for Certification or Analysis https://roos.com/docs/RBEH-C6DKWY?Open)
To View the Worksheet from Cal Exec and Save Csv:
- Open the Cal Exec results worksheet, click on Actions > Results, to open the worksheet window.
- (Optional) Choose Data > Save Csv to convert the data in the worksheet to a .csv file in the ~\RiApps\data directory. RITdb.datalog is always saved to Guru.
To Send Diagnose Results to Roos Instruments' Support:
- After collecting Diag results from the Cal exec, choose Apps > Guru Browser from Guru.
- Choose RITdb.datalog from the Key1: ri.sys.ObjClass dropdown menu.
- Under Key 2, choose ri.sys.Type and select Validate.
- Select all the recent results in the object table and choose Export > As Guru File from the right mouse button menu.
- Choose OK to close the Comments window, choose a location and enter a file name and choose Save.
- Attach the file to an email to [email protected] and include the Tester's serial number, reason that Diags were run, and a brief description of how to recreate the issue.
Figure 1: Example PMeter Connections
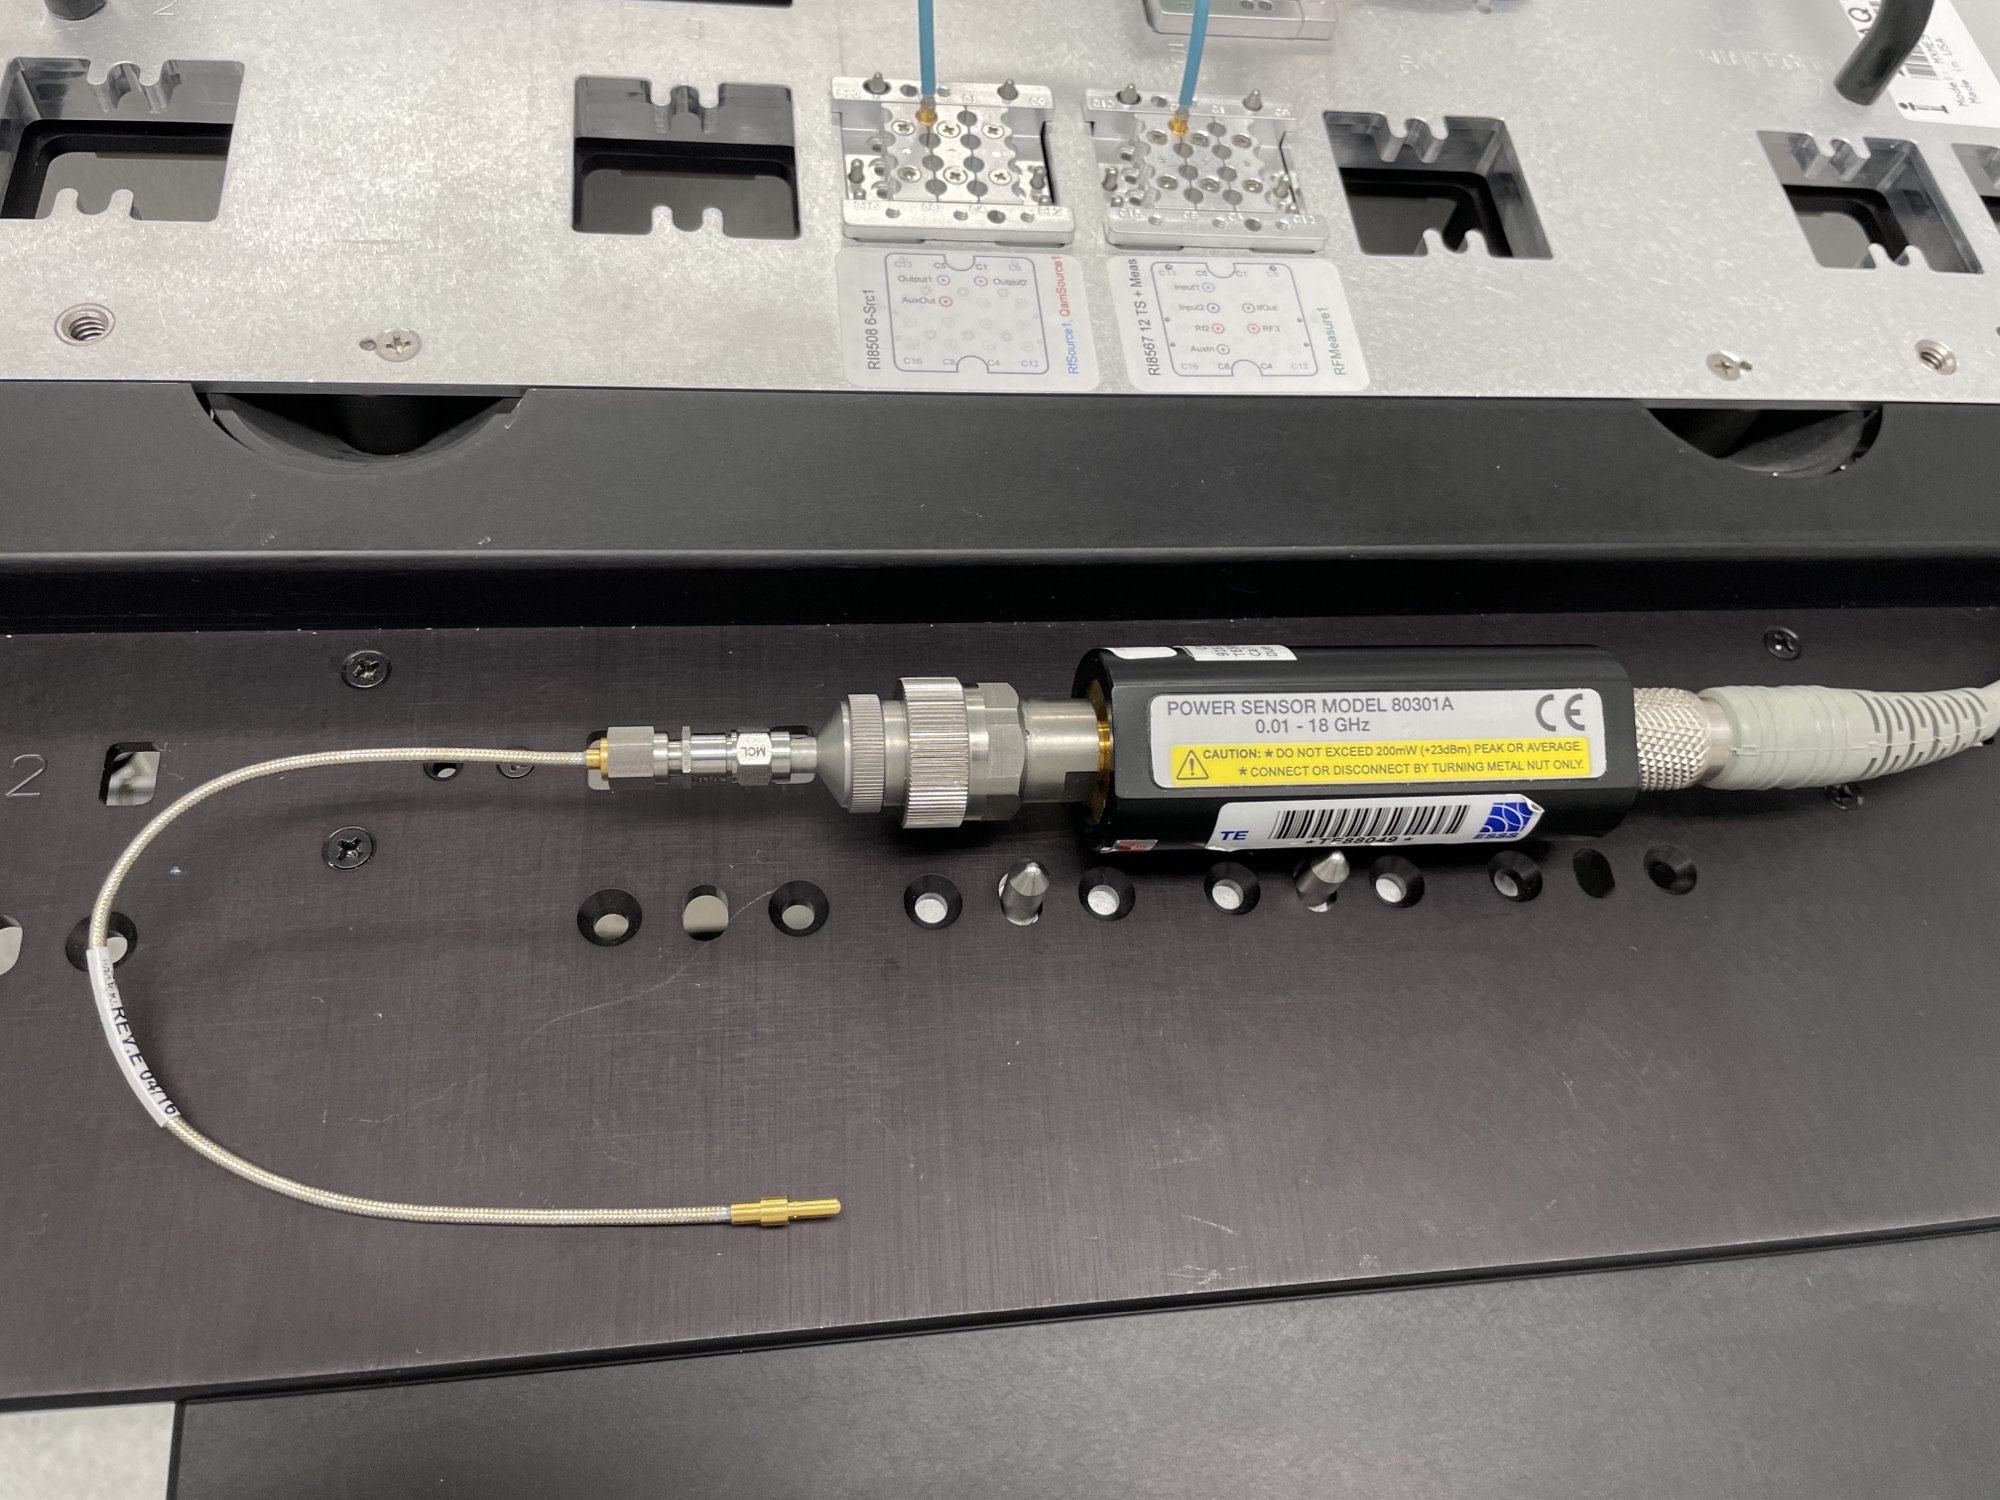
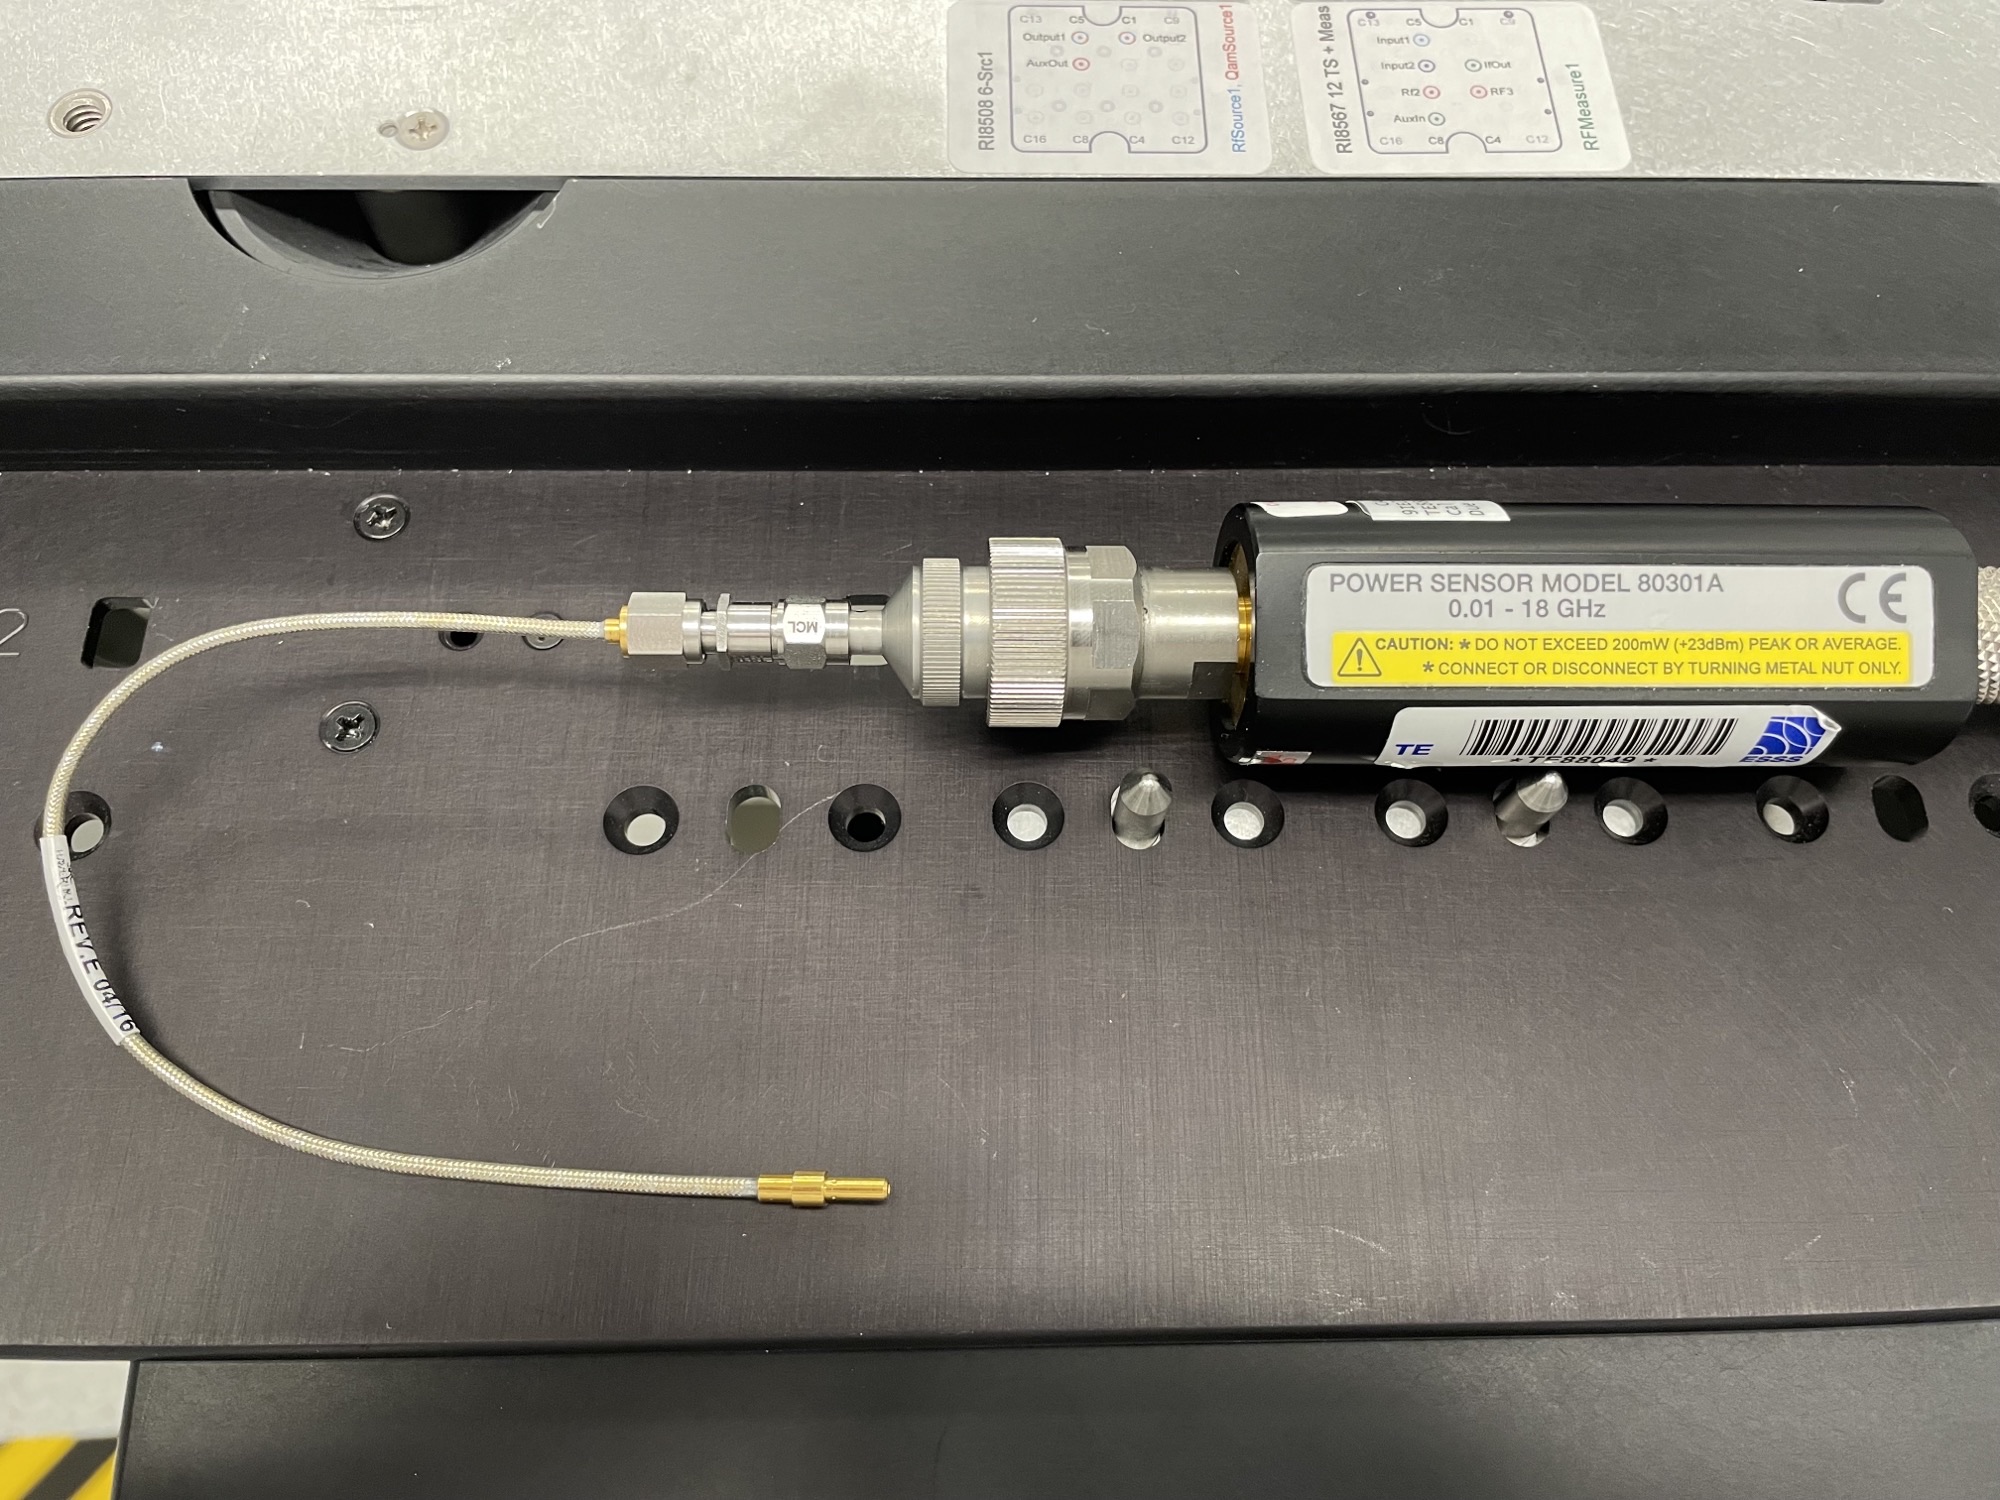
Figure 2: Power Sensor N to SMA Adapters (Male - Female)

