The Ri7100 System Software provides a vehicle to program the Static Digital resources into "Single-button" control of a DUT via a Serial Bus. This can be set up to allow descriptive names for the serial bus states.
Serial Bus Basics:
A Serial bus uses 3 or more "wires" or control lines to convey digital information. There is a Clock line that establishes a time reference. A Data line that has the data encoded on it and a Strobe line that establish when the data is valid.
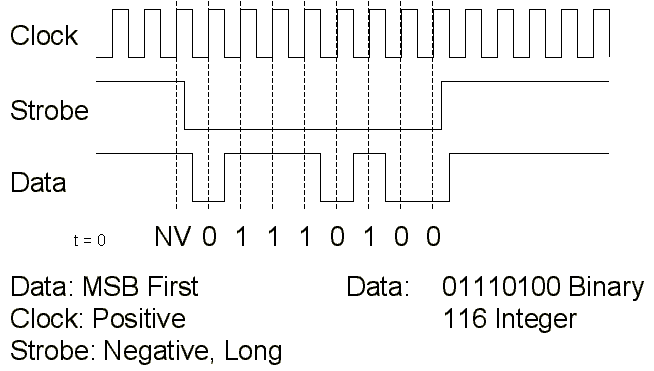
In this case the conventions are MSB first (t=0 on the left). The clock is valid on the positive edge. The strobe is valid low, and is a "long" Strobe meaning it must be low through the whole word. Since the data is MSB first, the data string is 01110100 (MSB>LSB).
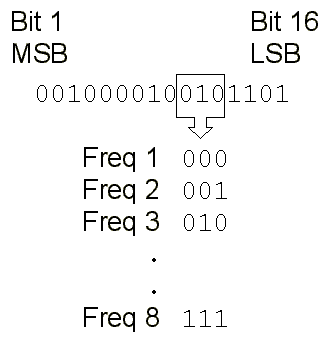
A Serial word contains several fields. These are arbitrary and a function of the design of the bus. In this illustrative case we will establish a 16 Bit bus that has a Frequency control field. This could be for a VCO or some similar function. The frequency filed is defined as 3 bits wide, starting at bit 10. Having 3 bits allows 8 potential states.
RI Naming Conventions
When programming serial bus' in the RI system there are several conventions to follow:
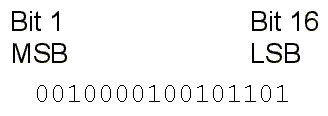
1.) Bits are named from 1 to N (no bit 0)
2.) MSB is always bit1
3.) MSB/Bit 1 is on the left
Register Addressing
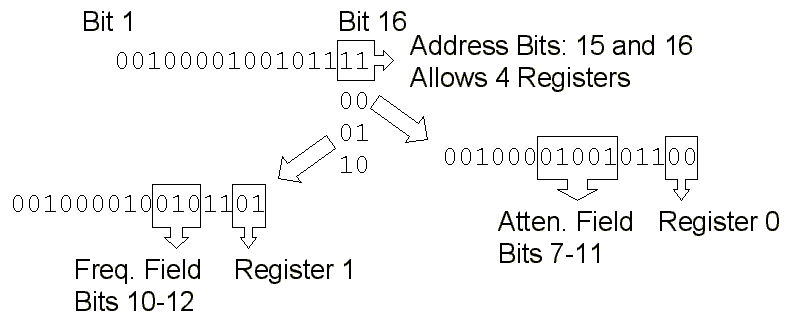
Serial ports can also have a level of complexity that allow "multiplexing" of the serial word. This is having multiple registers. In this case several of the serial word bits are coded as an "address". Each register has a unique definition for its own field. So depending on the address a specific bit of groups of bits can have different meanings.This allows a great expansion of the information that can be carried in a small number of bits. In the following example the 16 bit Bus is going to have 4 registers. The last two bits will be the register address. In register 01, bits 10,11 and 12 are the aforementioned "frequency" field. In register 00 bits 7-11 are an "Attenuation" field. Here bits 10 and 11 have different functions depending upon the address.
To Program a Serial Bus:
The Ri7100 allow Serial buses to be controlled 2 ways. "Dut Defined" which elegantly collapses the programming into a single button that resides in the DUT object, and Local, which is more "brute force" and involves coding the "ones and zeros" in to the individual test panels. We will concern ourselves with the "Dut defined" version
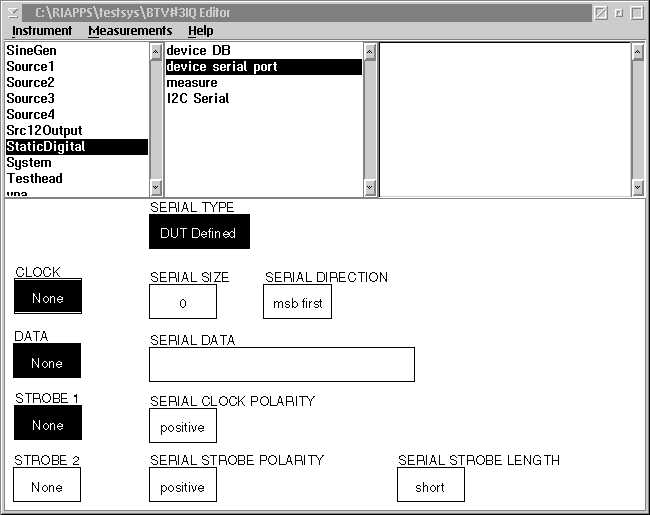
1.) First assign the Static Digital resources: Select the Clock, Data, Strobe and Serial Type buttons from the Static Digital panel and place them in the Global Defaults.
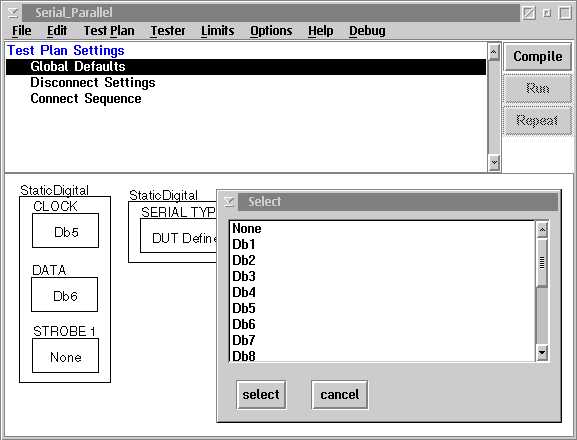
2.) Then select the appropriate DB lines in this case the CLK is DB1; Data, DB2 and Strobe, DB3.
Now we need to define the DUT
3.) Select the DUT object
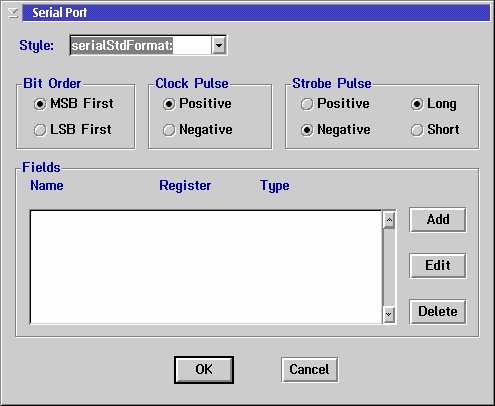
4.) Right Click and select Serial Ports: In this case, we need to Select:
Serial Style: Serial Standard format
Bit Order: MSB first
Clock Pulse: Negative
Strobe: Long
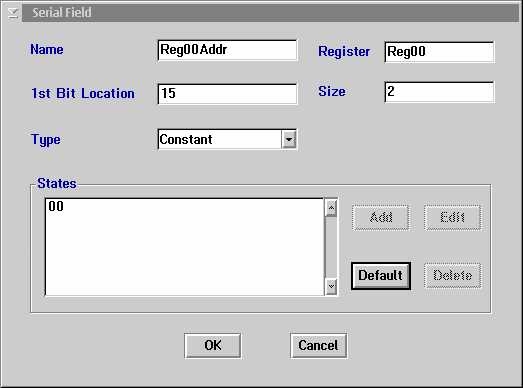
5.) Now we need to create the register addressing. This involves creating the field for the address that is shared for all the different addresses. To do this we add a field. We will name it Reg00Addr and assign it to Reg00 (register 0), 2 bits wide starting at bit 15. Importantly, we will make the type Constant, It cannot be state if it is an address. It is constant because in Register 0, these bits are always 00. When they are 01, they are in Register 1.
6.) Now the fields need to be set up for all the registers. In this example we will set up the field for attenuation that is part of Register 0.
The name is: Atten
1st Bit Location:Bit 7
Size: 5 Bits
Register : Reg00 (This ties it to the 00 condition for bits 1 and 2)
Type: State
We then add the states and the appropriate bit values, and assign one as default. It is essential to define the default value. The default value is assigned the asterisk.
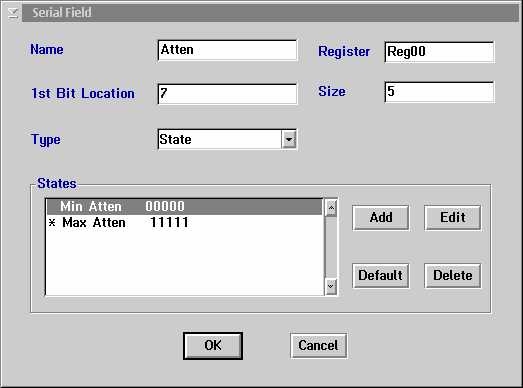
7.) Upon completion of the Serial Port definition. A DUT object will be created in the DUT>Dut Serial/Parallel Port:
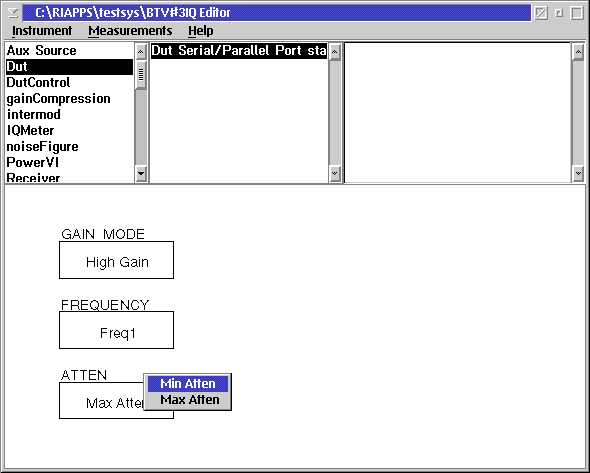
Attached is an example dut with the above programming.
Serial Bus System Timing:
Standard Serial bus control using the static digital resource switches at a 60KHz Clock rate.
With software revision 21C, High speed serial control up to 2.5 MHz clock rate is available.
To implement the fast clock serial:
1.) Special DB line combinations must be used:
Data must be DB2 with Clock DB3 or Data must be DB10 with Clock DB11.
2.) Obtain new button "Serial Clock Period" from Tester Editor.
3.) If button is not in your current editor, a new button must be created.
Start with a DUT Control>VCC5 button. Paste it in a test panel.
Change the buttons owner to STATIC DIGITAL (right click>change owner>static digital)
Position the mouse in the center button, and change configuration name to "Serial Clock Period". Units are in seconds.

