Guru can be set to ignore any Guru connections by adding "NoUpdate=true" and "NoBackup=true" to the RiSystem object. This is intended for systems that run offline. These instructions show how to disable these flags to allow a system to connect to Guru servers.
See Administration Tasks - Guru Server Address Book, Updating Guru Connections https://roos.com/docs/ECHN-6ZNT9H
To Enable Guru Connections by Removing NoBackup and NoUpdate Flags:
- Log in to Guru with Engineer or Roos Inst (user with a Developer role)
- Launch Cassini via the Short Cut button on Guru. (never launch from the Apps menu, and always choose the latest available version.)
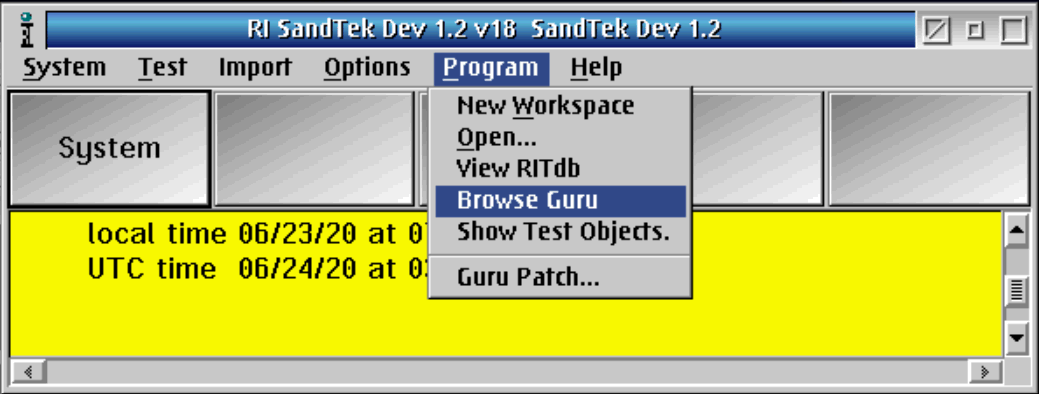
- Choose Program > Browse Guru to open the Guru Browser window. (See Figure 1)
- Choose Keys > Key1=Class to display all objects by ObjClass. (See Figure 2)
- Select RiSystem from the first column.
- Choose Keys > Key2 and select ri.sys.Name (See Figure 3)
- Select the system's Guru ID from the second column.
- Select the only only entry on the object selection list (right column), and choose Edit from the right mouse button or Objects menu. (See Figure 4)
- Remove NoBackup=true and NoUpdate=true by selecting the text and pressing delete key. (See Figure 5)
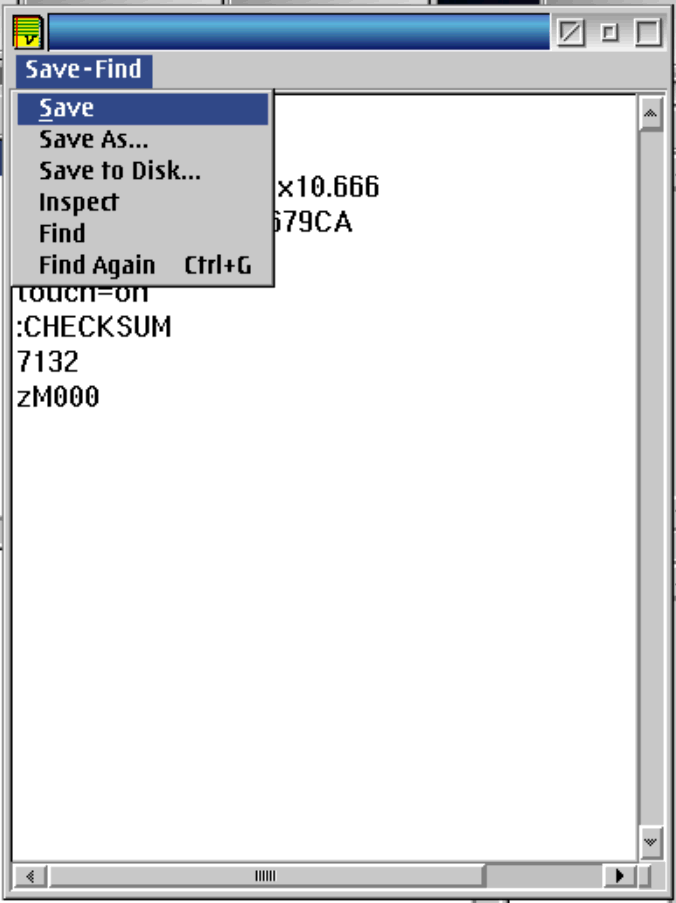
- Choose Save-Find > Save to save changes and close the editor window by pressing the leftmost close icon in the upper right corner of the window. (See Figure 6)
- Restart Guru by choosing System > Shutdown from Guru. Cassini software does not have to be restarted. After Guru is automatically launched from the startup script, the Logon button should be "yellow", indicating a update Guru is not connected. If Guru connections do exist, then then button is expected to be "green".
Figure 1: Program > Browse Guru
Note: Virtual Workstations have a yellow background, indicating that the software is in simulation mode and is not controlling instruments.
Figure 2: Guru Browser: Keys menu
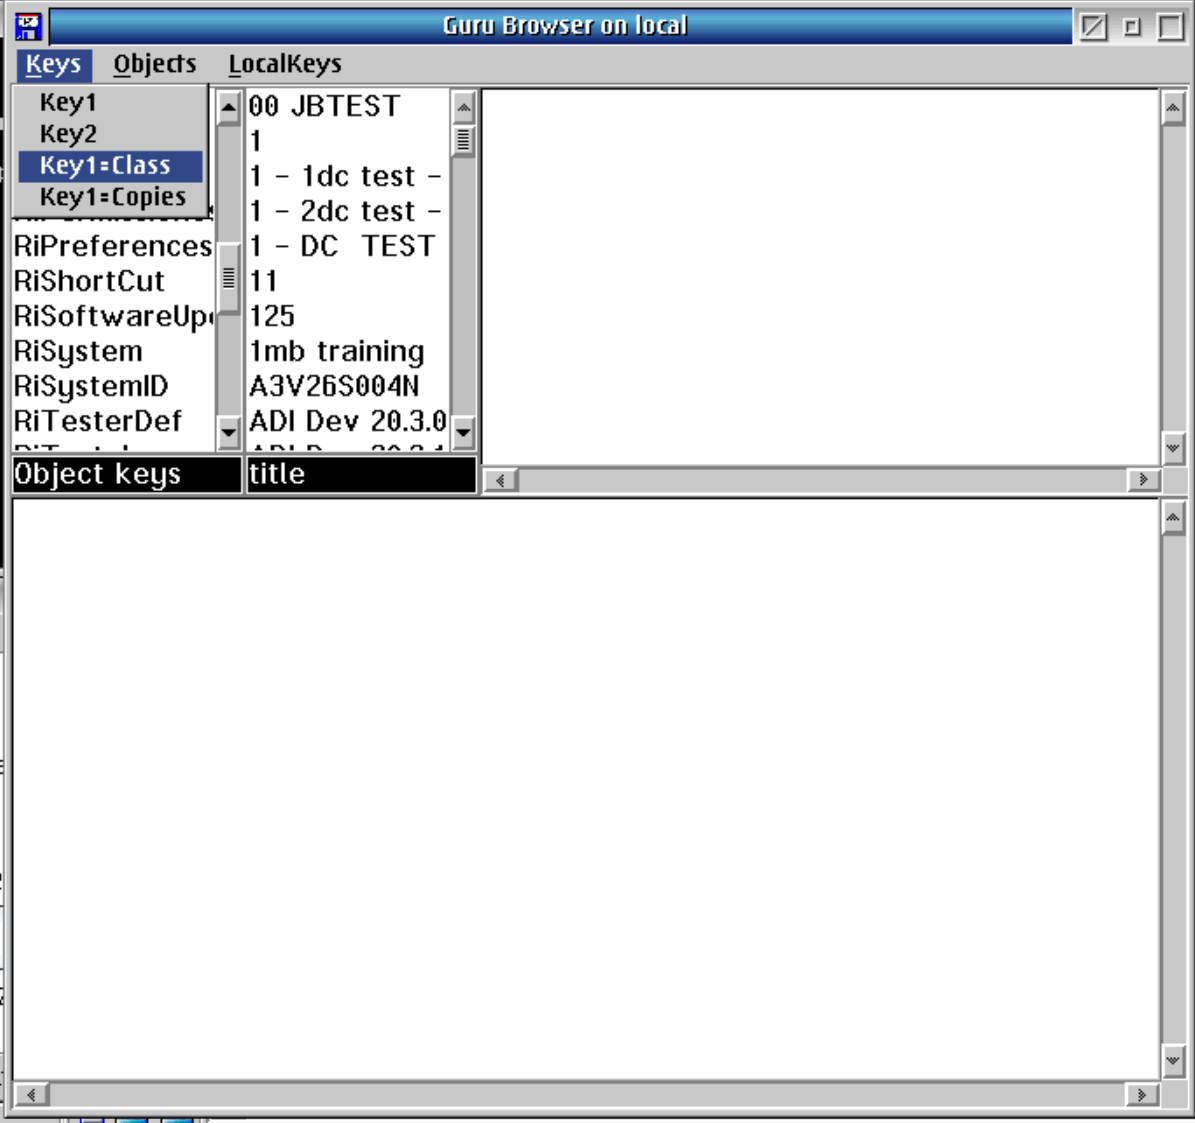
Figure 3: Select Key2 - ri.sys.Name selected
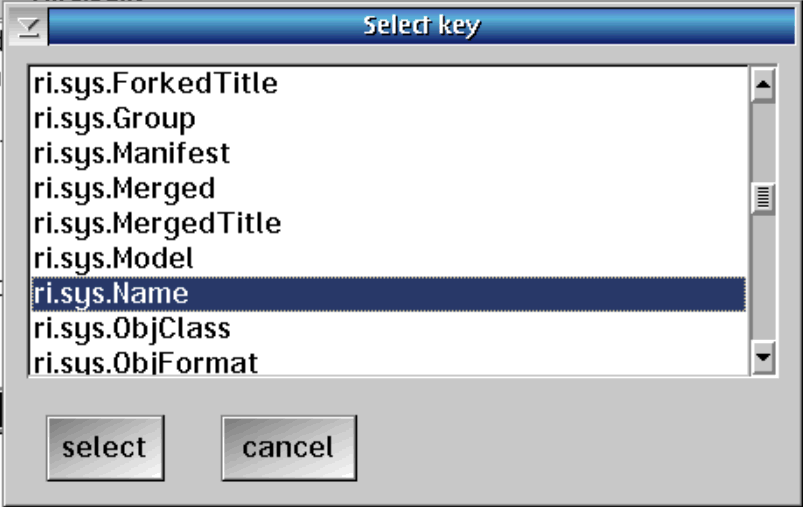
Figure 4: Edit from the right mouse button menu Selected Object
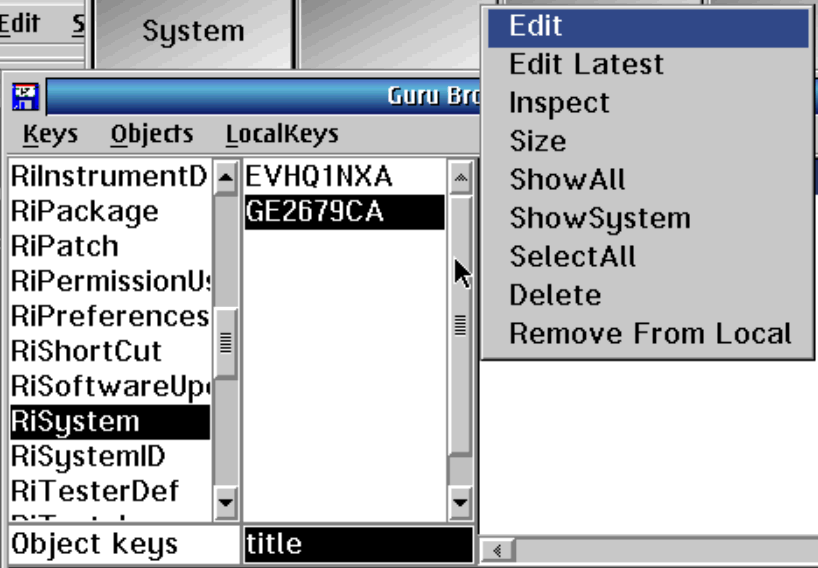
Figure 5: NoBackup and NoUpdate Flags Selected
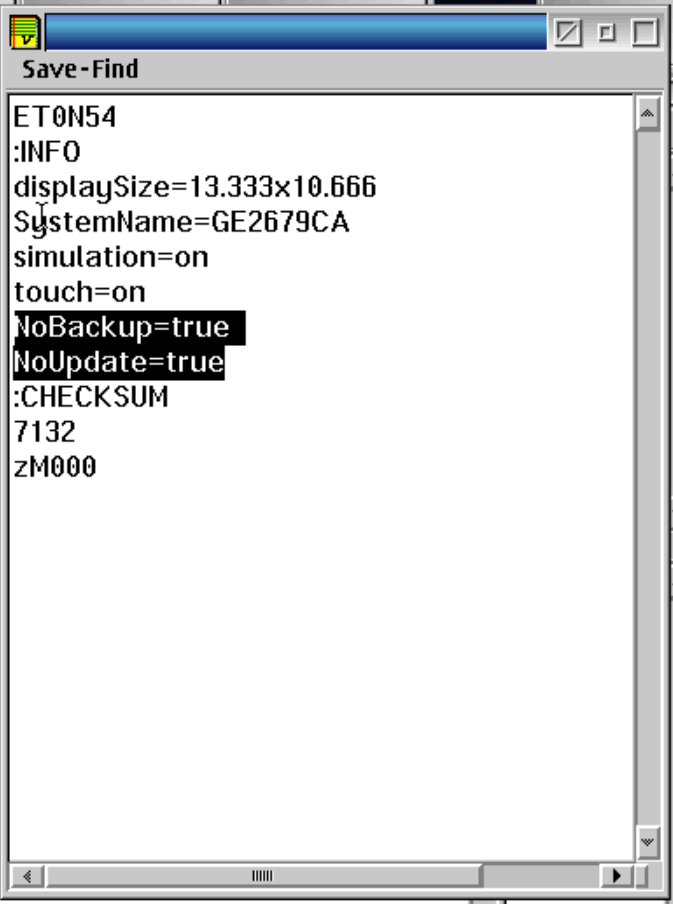
Figure 6: Save-Find > Save menu
