

There are two possible ways of setting up local printer for a RIFL2 (non-optical-fiber) system. It all depends on the system controller configuration, and may not be applicable for all systems.
First method: Add a second parallel port to the system, LPT2. This requires an open ISA slot (note: PCI parallel I/O card does not work with OS/2). Check and make sure there is an open ISA slot. If so, just insert the ISA parallel I/O card and create a new printer object. RI recommends the SIIG IO1818 card, and the following jumper settings:
DMA 3
IRQ 5
Port Address 278
LPT Mode ECP/EPP
To create a new printer object first select printer template as shown in Figure 1, this icon can be found in Printer folder or Templates folder, then drag and drop it on an open area, a “Printer - Create a printer” window will appear; select the printer driver and set the port to LPT2, as shown in Figure 2. If the correct printer driver is not shown, Click on “Install new printer driver …” and select the appropriate printer driver, Figure 3, install new driver if necessary. Be sure you set the new printer object as default printer.
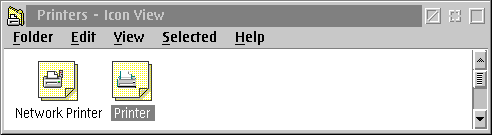
Figure 1.
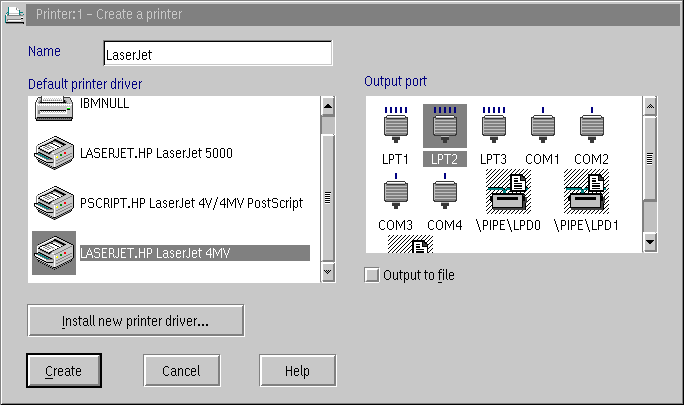
Figure 2.
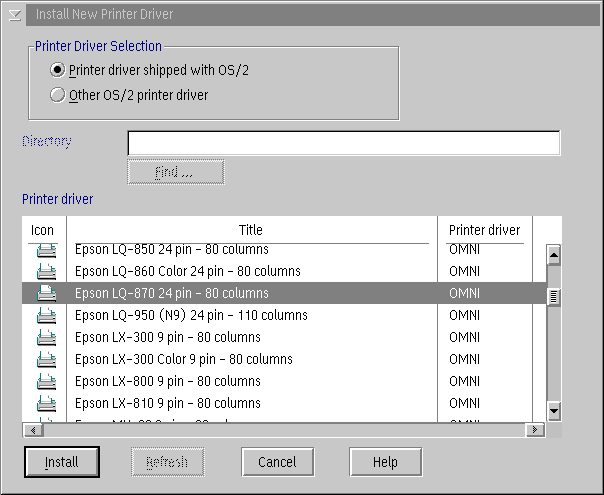
Figure 3.
Second method: Using an USB to parallel printer adapter. Not all computers have USB ports and not all USB ports will work with OS/2 (only Intel USB chip set work with OS/2 at this time), and not all USB-to-parallel adapters will work with OS/2 either. RI recommends Entrega’s USB to Parallel Printer Converter, CON-USB-P36. Before installing the USB-to-parallel printer adapter, there are two drivers that need to be installed first. USBBASIC, the USB basic device driver support for OS/2; and USBPRINT, the USB printer driver support for OS/2. These drivers can be download from IBM or contact RI. Download the driver USBBASIC, open an OS/2 command window, create a temporary working directory and expand the driver by running USBBASIC.EXE. Read the USBBASIC.TXT then install the driver by executing USBBINST.EXE. See Figure 4. for example. Repeat the same procedure for USBPRINT and read the README.TXT for detailed installation instructions, Figure 5 for example.

Figure 4.
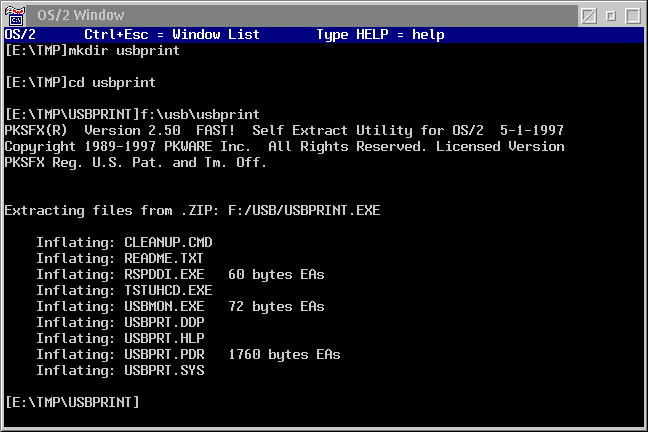
Figure 5.
Create the new printer object as described in the first method, this time selecting the USB port as the output port. Again remember to set this printer object as default printer.