A "Package Exec" or "Test Executive" is used to customize the Operator's interface and manage the flow of the Tests that are required for production. When an Operator activates an Exec, the Testplan is compiled and run with live calibration data assembled from the auto-cal of each instrument, the one time calibration of the fixture and load boards and the annual NIST traceable system calibration. This process enables the accuracy and reliability found only on a Cassini. Package Execs are required for typical production use and can work with User App objects which pair a specific exec with a specific Short Cut version. Please reference the ![]() Test Program Release Model - Release to Production to understand how the Exec fits into a typical production release cycle. The Package Exec maps Limits to Bins and datalog options are enabled. Execs are stored in guru with the "ri.sys.ObjClass = RiTestSessionDef" attribute and include a manifest that packages the RiTestplan when exported by Guru Browser (.gzp).
Test Program Release Model - Release to Production to understand how the Exec fits into a typical production release cycle. The Package Exec maps Limits to Bins and datalog options are enabled. Execs are stored in guru with the "ri.sys.ObjClass = RiTestSessionDef" attribute and include a manifest that packages the RiTestplan when exported by Guru Browser (.gzp).
Activate Package Execs
To activate or launch a package exec, choose Test > Run Package Execs... to open the Select Testexec prompt. (See Figure 1) When logged on as "Operator", users can only see Test Execs with the Status attribute to "released". A user can also activate "released" Test Execs via touch screen by choosing System > Test Execs button from the main Cassini window. If User Apps are used, choose User Apps button. When logged in with a user with Development role, Execs can also be activated or edited from the Test Objects browser, see
Edit Package Execs
Form the main Cassini window, choose Test > Edit Package Execs... to open the Select Testexec prompt. (See Figure 1) Filter and select an existing Package Exec from the list or click New to create a new one. Old versions of a selected plan can be accessed from the Version pull down menu. Device and Type can be used to filter the list of Testexecs shown. Additionally, use System > Test Objects to open the Test Objects browser, then select the "Device" > RiTestSessionDef and choose Edit Latest from the right mouse button menu on the highlighted Package Exec.
New Package Exec
Package Execs can either be "Standard" for normal production or "Verification" used for tests the parts against averages. (See Figure 2) Verification policy excludes many options and does not include Bins or Datalog tabs. Multisite may also appear on this list to allow for various forms of multiple DUTs mapping to the same or different testplans, depending on implementation. A custom Testexec Policy can be developed to meet specific workflow goals, contact [email protected] for details.
Editor "Exec" tab
Because the various tabs are related, options and tabs appear as the Package Exec is configured. The user may have to navigate to a tab, select "Add page", then navigate back to the first tab to access the newly created option. It will become obvious as features are explained. (See Figure 3)
Editing a Package Exec involves assigning the "Title" and selecting the "Device". Status is used to manage the release and version is used to distinguish different changes.
Select the Views and Options for display. Leave the Device field blank to select any Testplan.
The Add Page and Del Page buttons are used to extend or contract the number of Testplans, Limits and Datalog tabs.
Press Ok button to save or save as if the Title changes and close and choose the Cancel button to abort any changes.
Since late 2019, an update changes the "Ok" button to "Save".
| Field | Meaning / Intended Use |
| Title | Name of this test exec. This will be the name displayed in the view to select and run the exec. |
| Device | The name of the device definition. This field is a drop-down list created from the Device definintions found in your Guru. |
| Type | The supported types are "Production", "Retest", "Development", "Deprecated", and "Special". They are used to help organize test execs and describe their place in the testing lifecycle. |
| Status | This includes values of "alpha", "beta", "released" as well as others. It describes the degree of completion of the exec |
| Version | You may enter a number to represent the version of this exec. The number may be structured any way you choose, such as "1.00" or "v4.33.66" |
Views:
| Option | Meaning |
| Worksheet details window (Figure 4) | Displays a table view of every result showing device, result (PASS/FAIL), test time in seconds, cycle time and site. Each test displays test number, name, units and upper and lower limits for the default limit. (does not display graded limits) Each failing data is highlighted with red background. File menu allows export as CSV. |
| Pass/Fail Window (Figure 5) | An adjustable window that shows green for pass and red for fail. It can be seen from a long distance across the test floor. |
| Barchart of Hardbins (Figure 6) | The graphical view of passing and failing bins shows a bar for each bin. |
| Barchart of Softbins (Figure 7) | The graphical view of passing and failing "soft" bins shows a bar for each bin. |
| Barchart of Tests (Figure 8) | The graphical view of passing and failing tests shows a bar for each test. |
Options:
| Option | Meaning |
| Abort testing on Failure | Will stop testing on first FAIL (exceeded limit for test). A similar setting can be set by the Test Plan Developer in the Testplan, or cna be set on the Testplan tab for a specific testplan, if multiple testplans are specified. |
| Auto-save Lot Summary report | Creates a PDF or Printed "Lot Summary" report. (See |
| Include tests in Lot Summary report | WARNING: Makes file size large. This includes every test result in the Lot Summary report. Ignored if above option is not included. |
| Simulate handler if absent | Allows Exec to Run without a handler instead of Alerting operator. |
| Operate testexec manually | Each "Start" will reset index count to 0. Operator must press Start for each DUT. |
| Location (x,y,subdie) for part index | Replaces DUT index number (1,2,3...) with the x,y,subdie location information provided by a Prober. |
Editor "Testplan" tab
Select a valid Test Plan from the "Name" field as seen in Figure 9. Select Options, Site and Datalog values. To lock the testplan version, select "Do not update tesplan revision automatically" option. When releasing a new version of the testplan with the same Name, simply disable this option and save the exec. Once the evaluation is complete, select this option and save again to lock the testplan to the current version.
Use Add Page button to add additional Testplan tab(s).
NOTE: Additional Datalogs are added by clicking Add Page from the Datalog tab.
Editor "Limits" tab
Limits are used to set values of specific measurements of a Test Plan used to grade or sort the DUT into Handler Bins. (Figure 10)
Clicking on the Limits tab below Testplan will allow you to select the Base limit. (Figure 11)
Details are accessed by clicking on the Limit1, Limit2, Limit3, etc. tabs along the bottom of the Limits tab.
Use Add Page and Del Page buttons to adjust the number of Limit# tabs.
Select the Name of the Limits stored in the Testplan from a pull down list. Assign Default Hard bin values for Pass and Fail or enter "L1", "L2", "L3", etc... to select the next set of limits for Graded DUTs. Use the Limits map: table to assign Soft bin numbers for test results. Use the same soft bin to group similar tests. Edit by holding the ALT+Left mouse button click in the Soft limit column to modify.
Graded Bins
Implement graded bins by using the Limit# page's Default Pass and Fail bins as a simple sorting algorithm. Partition the limits in progressively narrow limits in a way where the Min/Max result value assigns the Hard Bin. Rely on the Hard Bin "Type" to set the "PASS" result.
Reference "Auto-Trial Graded" (RiTestSessionDef) as a sample that shows how to setup the Limits tabs. This example uses the limits described above for "Test 1" and shows how graded parts are sorted through the logic of the limits and assigned into the appropriate hard and soft BIN. (See Figures 12-17)
In an example with 3 grades of DUTs, the "ABC" limit sorts out standard DUT failures from with a "L2" as Default Pass bin and the "2" as the Default Fail Bin on the Limit1 page. On Limit2 page, the "AB" Limit sorts out "L3" as Default Pass bin and grade "C" parts as the Default Fail Bin. On Limit3 page, Limit "A" sorts out "A" Passing and that leaves the remaining as Default Fail bin with grade "B" DUTs. The "fail" bins do count in the Datalog and graphs as a PASS bin as defined on the Hart Bins "Type" column.

Editor "Bins" tab
Soft and Hard bins are viewed from the "Bins" tab. (See Figure 18) Right Click on the column heading to access the Export and Import CSV options.
The "rank" value of the softbin determines which softbin is reported to the data log file when more than one softbin is triggered, usually by the Limits Map in the previous screen. For example, if a test called "Icc" fails to bin 3 with rank 200 and a test called "Pout" fails to bin 7 with a rank of 500, the system must make a choice if both tests fail. In this scenario the softbin with the highest "rank" will be reported to the data log file and the part will be placed in bin 7.
Hardbins are generally more limited in number than softbins. You may employ dozens or more softbins but your part handler likely has only a few physical hard bins. Note that the notion of "pass" and "fail" applies to the hardbins only. The softbins inherit the pass/fail setting of the hardbin they are mapped to. Like softbins, the hardbins may be either edited directly or saved to CSV for editing in a spreadsheet.
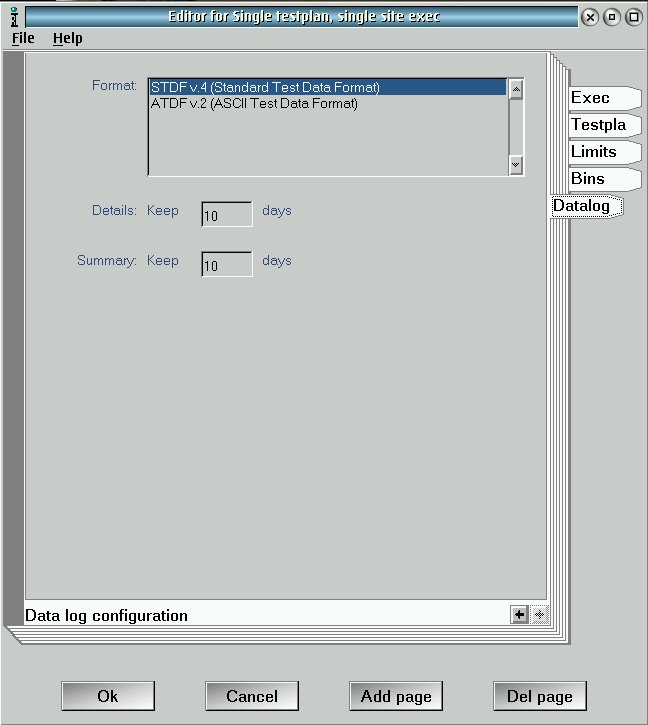
Editor "Datalog" tab
Datalog options (see Figure 19) include Format and the number of days to retain Detail and Summary files in Guru.
Use a Guru Agent to export the datalog to another location for processing. (Reference
Figure 1: Select Testexec Prompt
Figure 2: Testexec Policy prompt

Figure 3: Editor Exec tab
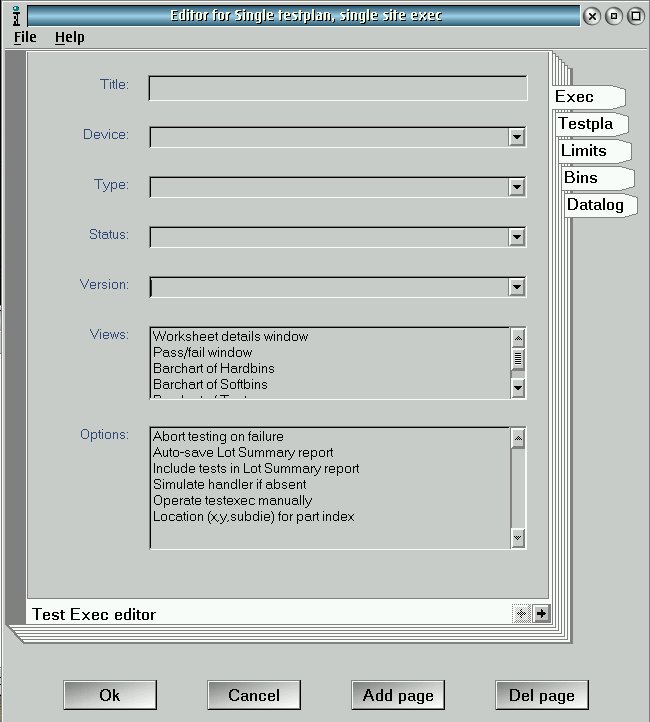
Figure 4: Worksheet Details Window: (See
Figure 5: Pass/Fail Window
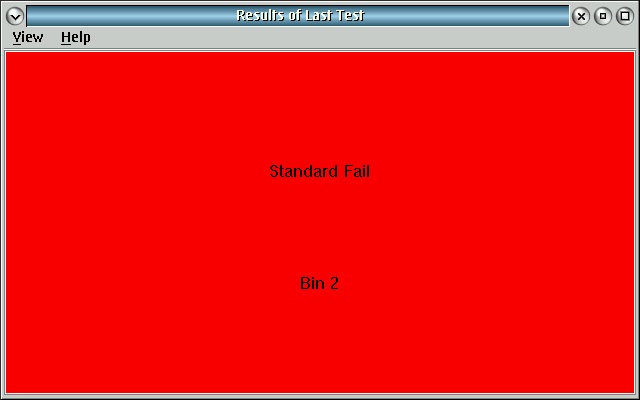
Figure 6: Barchart of Hardbins
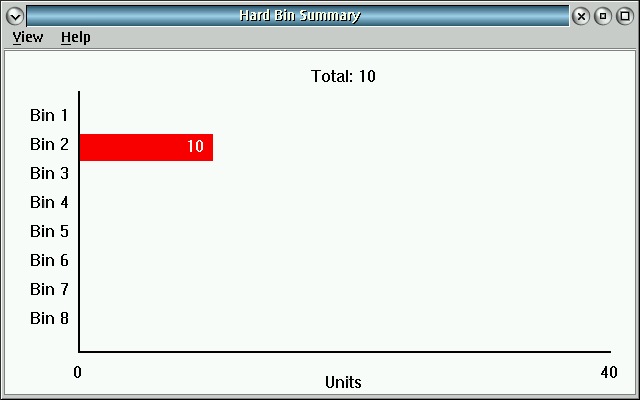
Figure 7: Barchart of Soft bins
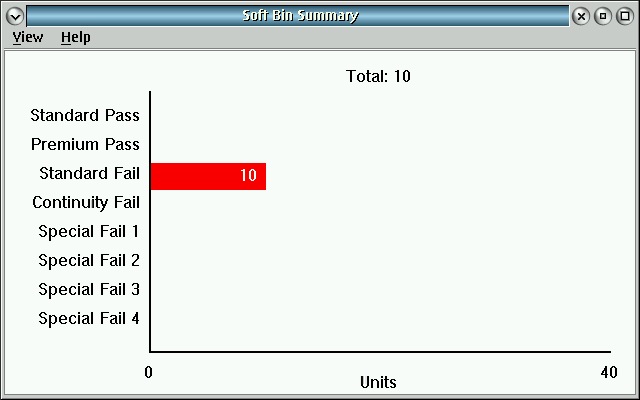
Figure 8: Barchart of Tests
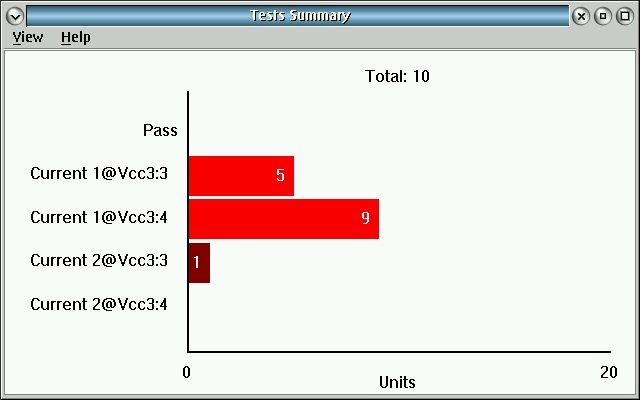
Figure 9: Testplan tab
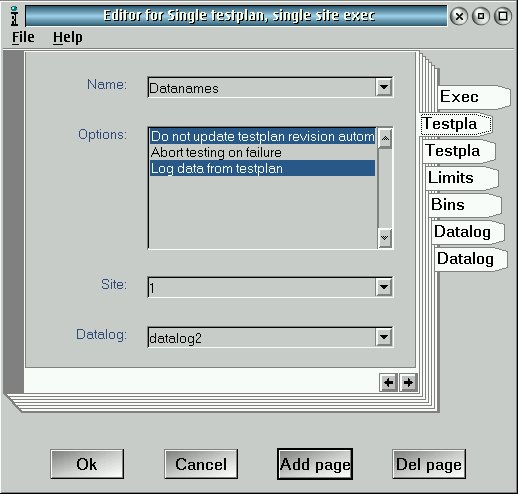
Figure 10: Limits tab
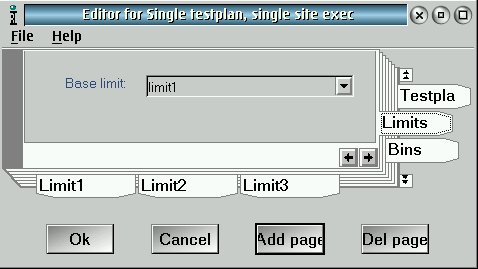
Figure 11: Limits tab > Limit 1 (bottom row)
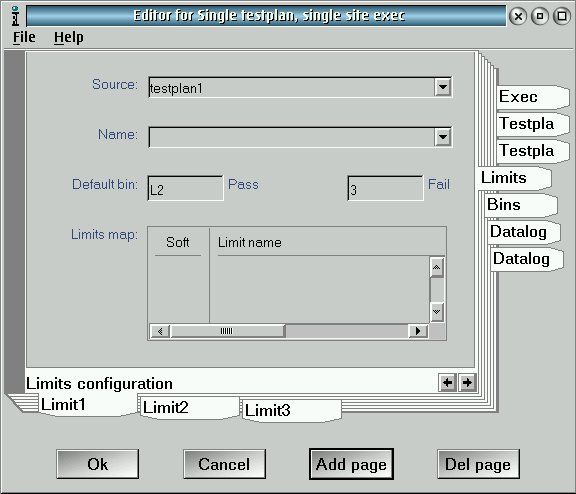
Figure 13: Graded Example Limits tab > Limit 1 (bottom row)

Figure 14: Graded Example Limits tab > Limit 2
Figure 15: Graded Example Limits tab > Limit 3
Figure 16: Graded Example Bins tab
Figure 17: Sample "Auto-Trial Graded" Running with Soft Bin, Hard Bin Summary graphs and Worksheet.
Figure 19: Bins tab
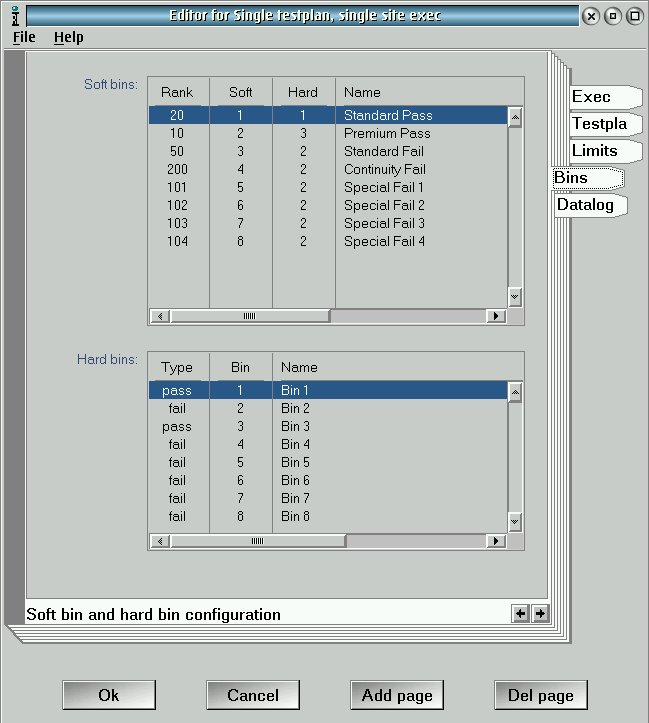
Figure 17: Datalog tab