

ArcaOS provides a GUI for configuring network shares with SAMBA. SAMBA can connect to modern SMB implementations (like Windows 2008 Network Shares and Linux hosts) and can traverse the NAT network settings typically configured in Virtual Workstations.
| ATTENTION!
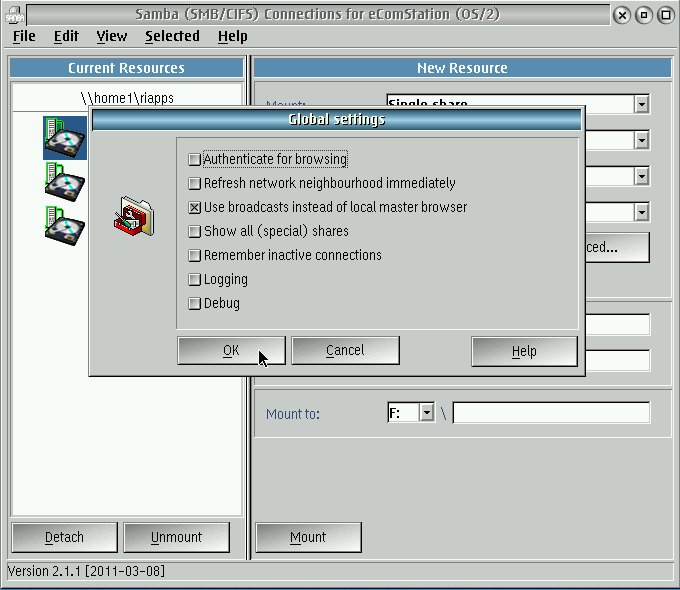
Browsing a large (>50 hosts) network neighborhood can cause the GUI to use 100% CPU and consume all the network resources. It will make the system appear to be hung, but in reality, it is busy trying to detect all the systems shared. It could take a very long time (5+ minutes) depending upon how big the network is. DO NOT cycle the power, if you turn off the power, it may corrupt the OS2.INI and SYSTEM.INI file and your system may not restart. If you are running VNC it will also become unresponsive. When starting "File and Directory Connections (Samba)", first disable the "Refresh network neighborhood immediately" option from the File > Global settings menu. If not selected, also un-check "Use Broadcasts instead of local master browser". |
To Mount Shared Network Drive:
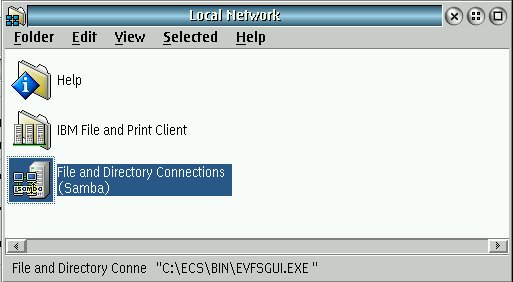
- Choose Desktop> Local Network > ArcaMapper Connections (SMB/CIFS) or File and Directory Connections (Samba).
ATTENTION! A large number of SMB shares may crash the GUI, you can prevent this by removing the check next to "Refresh Network Neighborhood Immediately" from File > Global Settings dialog.
- Choose View > Dialog instead of browsing the Network neighborhood.
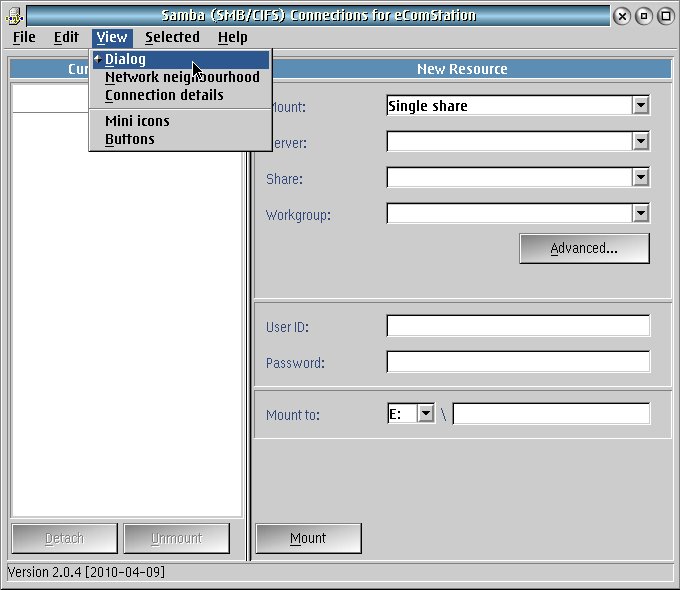
- Set Mount to Single Share, enter the Server hostname or IP address (i.e. "server1") and Share ("SharedFolder"). Workgroup field is typically optional, but may be required for servers hosting multiple domains.
- Type the User ID and Password and select choose a drive letter for Mount to.
- Press Mount button to mount the drive.
- Choose File > Autostart > Enable to mount this drive automatically during OS Startup.
- Use this drive letter when copying files to and from the guest OS.
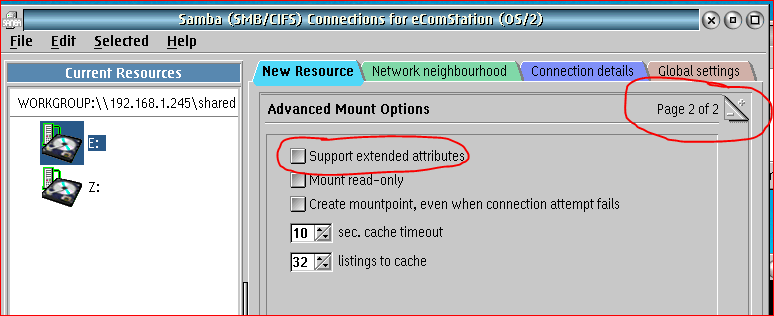
- Disable "Support extended attributes" on page 2 when mounting a new resource. The server must support OS/2 Extended attributes for this option to allow you to transfer files with the GUI.
The new drive will appear immediately, if there are problems with the username or share, the folder can be selected and edited again, press "Mount" to update the settings.
To Copy Files:
1. Highlight the .GZP file by opening the target folder and selecting the file.
2. Choose Copy... from the right mouse button or Edit menu.
3. Select Drives tab and select the desired destination. Use the + symbol to expand the contents of a folder.
4. Choose Copy button to copy the file to the destination.
Note: If a "Could Not Copy" error message appears when dragging a file to a shared network folder, the server may not support OS/2 extended attributes (see Samba Server Configuration). The GUI attempts to store the folder layout when using drag and drop and that can interfere with the transfer of the file. The end result is an empty, or zero 0 size file. Follow the procedure above or use a command window to transfer the files with the "copy" command, similar to "copy d:\*.gzp e:\".
Choose Desktop > Computer > Printers > Install CUPS Printer to launch the setup wizard. See CUPS compatibility page for more information.