The Bias Correction System (BCS) is used to generate test specific offsets for each DIB setup that are used as correction offsets on the test results used to achieve correlation goals. Use this when repeatability goals are not achieved with normal vector error correction that is built in to the Cassini system. The BCS system is designed to maintain the advantages of full vector (phase and magnitude) error correction while providing absolute offsets based on target data from serialized, known reference DUTs (aka "golden" DUTs). This is done by running a lot of passing "gold" DUTs that are use later used as reference measurements used to calculate and apply precise corrections on each test result based on the measured difference from a single Control Unit (CU) test data. Upper and Lower limit tolerance can be assigned to each offset to invalidate excessive measurement discrepancies that could mask subtle wear would need to be addressed.
Required Software
Cassini Short Cut with the following Patches: 160
Bias Correction System v2 (v###) (rev B app allows change ExpireOn ) - rev A sets ExpireOn defaults to 30 days,
Db Manager v32+
Test Exec with production ready Testplan with limits with the "Use Bias Offsets" option enabled
Using the Bias Correction System
Cassini software should always be launched by the latest available Dev or Production Short Cut.
The Bias Correction System (BCS) App can be used in development via the Test Plan Editor and in production via the Test Exec. Follow the steps to Enable Bias Correction System (BCS) in Test Exec and follow the steps to Prepare BCS By Importing CU Test Data and Limits for any time the TestExec or CU Devices change or at some time interval as specified by statistical workflow requirements. Import the Control Unit (CU) device data and define the Upper/Lower CU Tolerance as well as standard Upper/Lower limits for serialized set of DUTs in a .CSV file (reference template for layout requirements) that is imported and assigned to the appropriate Test Exec. The BiasOffset Min/Max limits are automatically added to the Testplan and used when testing the "gold" DUT. When a production lot is ready to be tested, open the Exec and the BCS app will automatically appear. Load a serialized "gold" DUT in the socket and select the appropriate CU Serial Number to identify the reference data used in the calculation. Choose Clear Offsets and Run, Calculate and Apply Corrections and then choose RUN again. If a Pass result is encountered (tolerance pass), compare the "gold" DUT test data results with CU Data and when satisfied, choose Save Corrections to create the RiTestplanVars object that is set to expire in 30 days (by default). If a FAIL result is encountered, perform standard DIB/Fixture debugging. The offset data is stored for 30 days (by default) and is applied automatically when the Test Exec is activated. If offset data is not available, the BCS app will open automatically to facilitate the data collection process. The BCS window can be closed and Exec run with the lot of production DUTs. The correction data should be created once after each setup (every time the DIB/Fixture is latched). Best practices suggests adding a "golden DUT" at the end and using the BCS RUN button to compare the results with CU data to validate that nothing has drifted during the lot.
IMPORTANT: Never use "Run" on the compiled Test Exec or Testplan UI until after all the BSC steps are complete. If CTRL+ Break keys are pressed to interrupt running Exec, remember to perform System > Reset before proceeding.
To Enable Bias Offsets Option in Test Execs:
- Launch the Cassini app by choosing the lastest Dev from the Short Cuts button.
- Choose Test > Edit Package Execs and choose the target from the list and choose select (or new to create a new Test Exec)
- Choose Use Bias Offsets in the Options field to enable this feature. Test Exec must have valid limits enabled for this feature to have any effect.
(Optional) From the Worksheet, choose Export as CSV with Emit > Transpose CSV enabled to save the reference CU Data .CSV file. - Choose Save/OK to close the Exec.
- Repeat the above steps for all Test Execs that should use the BCS. Continue on to "Prepare BCS by Importing Control Unit (CU) Data and CU Limits" steps for each Exec.
Prepare BCS by Importing Control Unit (CU) Data and CU Limits:
- Launch the Cassini app by choosing the lastest Dev from the Short Cuts button.
- Latch the needed Fixture & DIB and prepare a batch of serialized "gold" DUTs.
- In production, choose System > Test Execs or Test > Run Package Execs and choose the target Test Exec from the list and choose select. In development. choose Test > Plans and select the target Testplan from the list and choose select.
- Choose Run with the serialized DUTs to collect data.
- From the Worksheet, choose Export as CSV with Emit > Transpose CSV enabled to save as the CU Data. (From the Test Plan Editor UI, choose Options > Worksheet > Details to open the worksheet window.)
- Open the reference "ExampleBiasControlData.csv" file template and confirm the format is the same. The Device IDs (count) should appear in column A, row 1 should include Test # and then list the numbers assigned to each test, row 2 lists the Test Name for each test. Rows 3 to last fow (EOF - end of file) represent the actual measurement result for the test in that column. The value in the first column populates the CU Serial Number field that is chosen when that specific DUT is loaded during the Clear & Run, Calculate & Apply, then Save Corrections process.
Note: There will be drift across the lot as the temperature stabilizes, best practice is to pick DUTs at least 30 from the start of test depending on test time and temperature variation through the lot. - From the Testplan Editor, choose Limits > Table, then File > Export CSV to save the limits to CSV file.
- Open the exported CSV in any spreadsheet application and perform the following manipulations to match the template.
Remove Row 1 "### Begin Limits ###" - Open the reference "ExampleBiasTestLimits.csv" file template and paste the target values from the limits table into the Lower Limit and Upper Limit columns.
See Limit CSV Template Column Descriptions - Launch the Bias Correction System from the Apps button.
- Choose Import > CU Test Data File and select the "data" CSV created in the steps above.
- Choose the target Exec from Import CU Data for this Test Exec pull down list and choose OK. A new "BCSdata" guru object is created with the Name attribute <Device>+"ControlData" and Title for the Exec that it is associated with.
- Choose Import > CU Test Data File and select the "limits" CSV created in the steps above.
- Choose the target Exec from Import CU Data for this Test Exec pull down list and choose OK. A new "BCSlimits" guru object is created with the Name attribute <Device>+"TestLimits" and Title for the Exec that it is associated with.
- Done preparing the BCS for use, proceed to Use the Bias Control System steps.
To Use Bias Correction System with Test Exec: (in Production)
- Launch the Cassini app by choosing the lastest Dev from the Short Cuts button.
- Choose System > Test Execs or Test > Run Package Execs and choose the target from the list and choose select.
- If the Corrections are valid, the Exec will open as normal. If no valid Corrections are found, then the BCS app will automatically launch.
- From the Bias Correction System window, choose the open Test Exec from the Test Execs pull down menu and a Worksheet will appear.
- Choose the CU Serial Number that corresponds to the DUT in the socket from the drop down list.
- Choose Clear Offsets and Run to test the CU DUT and generate test data used to compare with the reference data collected above. (Pre-Check Limit File will be selected automatically. This can be changed for debugging purposes)
- Choose Calculate and Apply Corrections to generate the offsets. (Post-Check Limit File will be selected automatically, this also can be changed for debugging purposes.)
- (Optionally) Choose RUN and compare the results to the CU Data. Open the CU Data by choosing View > View CU Data menu. The results should be extremely close.
- Choose Save Corrections to generate the RiTestplanVars object and apply offsets when this Exec is Run. (note: RiTestplanVars defaults to expire in 30 days)
- Close the Bias Correction System application. The offsets will be loaded any time that Exec is opened.
- Launch the Cassini app by choosing the lastest Dev from the Short Cuts button.
- Open or create a new Testplan from the Test > Plans menu.
- Follow the procedure "To Generate CU Test Data" to generate at least one set of CU Data.
- Choose Debug > Load Bias Offsets and select CU Data to run with the offsets enabled. Choose Debug > Clear Bias Offsets to remove those offsets.
- Adjust limits based on a wide sample of testers, fixtures, dibs and from different device lots.
To Remove BCS Data:
Only one set of data,limits and correction data (RiTestplanVars) can be active at any time. Cassini will always use the latest object, if multiple exist. To restore an older object, obsolete any newer object.
- Lunch Guru Explorer from Apps button.
- Change ObjClass = to match any of the following object classes
BCSdata - Imported CU Data for a specific TestExec/Testplan/DUT
BCSlimits - Imported CU Limits for a specific TestExec/Testplan/DUT (see Limit CSV Template Column Descriptions)
RiTestplanVars - CorrectionData (default expire on 30 days) - Select target objects based on Name or Title, choose Obsolete Objects from the right mouse button or Admin menu.
- Objects will be removed immediately and no longer available. Follow "To Restore Obsolete Objects" steps in How to Obsolete (permanently remove/delete) objects in Guru to restore BCS Data.
- Close Guru Explorer
Interface
File > Connect Guru allows the user to connect to any other Guru (defaults to Local Guru).
File > Exit prompts to Confirm (Yes/No) before closing the Bias Correction System application. Any corrections would be lost unless Save Corrections is pressed before closing.
Device Name set by the Test Exec.
Refresh button is used to load CU Data associated with the Test Exec (i.e. immediately after importing.)
Figure 1: Bias Correction System
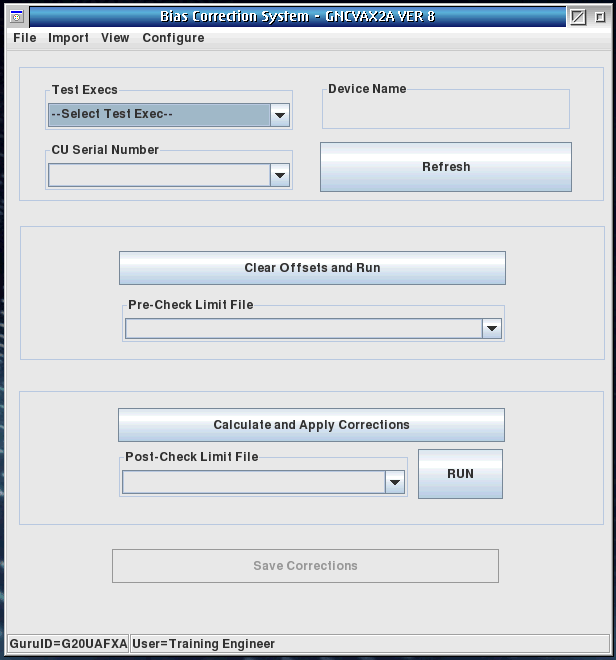
Figure 2: Bias Correction System > File menu
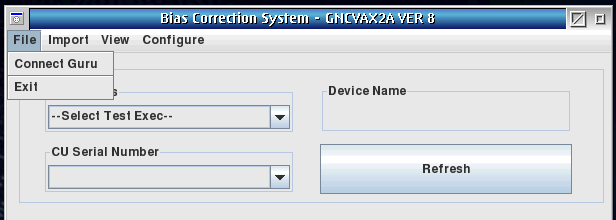
Figure 3: Bias Correction System > Import menu
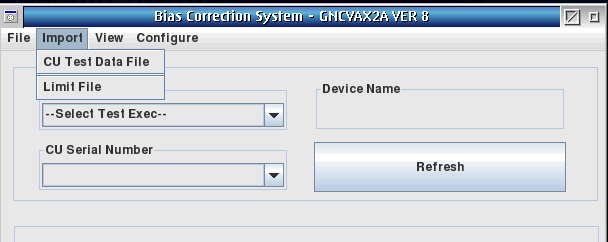
Figure 4: What is your Test Exec? Prompt
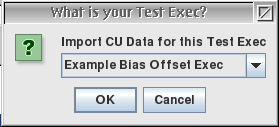
Figure 5: Bias Correction System > View menu
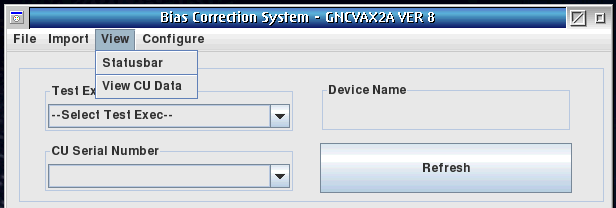
Figure 6: Bias Correction System > Configure menu
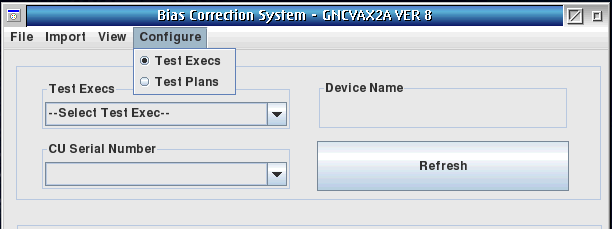
Figure 7: Use Bias Offsets option in Test Exec Editor

Figure 8: Testplan Limits with BiasOffsets
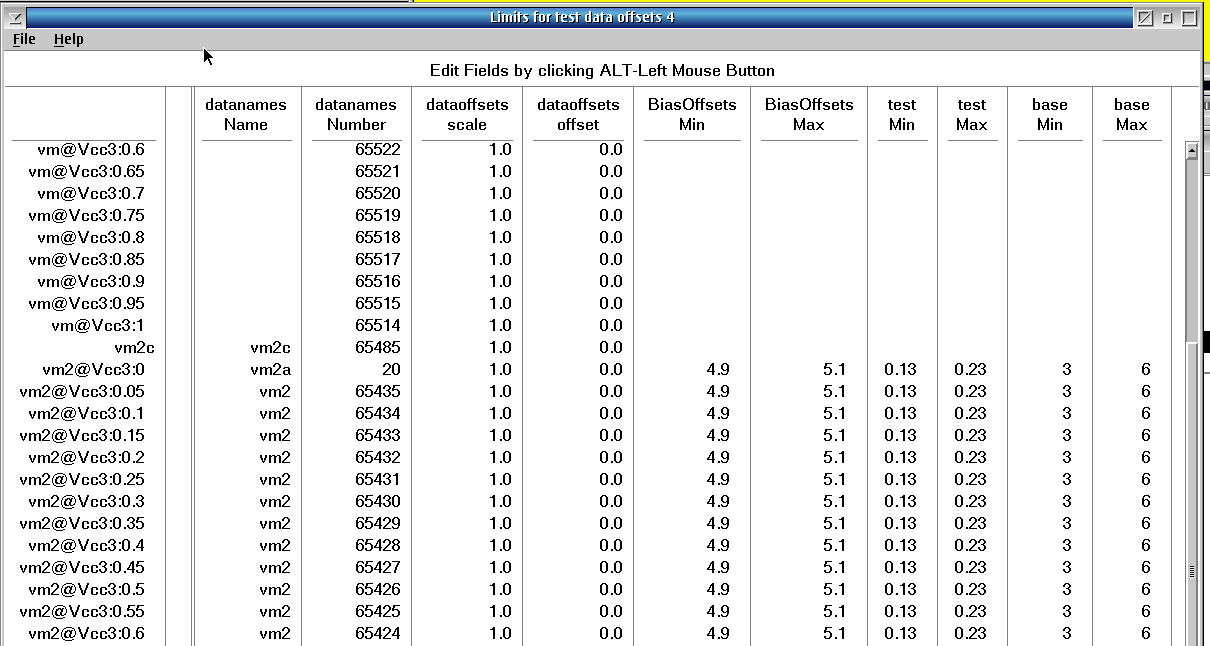
Bias CU Data and CU Limit .CSV File Templates
Modify the files above to paste the CU Data collected in the steps above. The column order must match precisely and the data must start in row 2. Row 1 is not parsed, so the columns must align with their expected import values.
Data should have each CUnit appear as rows, with columns aligning with each row in the limit CSV. Limits should match the template.
Limit CSV Template Column Descriptions
A Enabled? must be "YES" (case sensitive) - any other value will not be parsed by the importer and will be ignored by the BSC system
B Test Number - "State" column B from limit .csv (must be in the same order as the datalog used to output the Bias CU Data)
C Test Name - (not imported) "Setting" column C from limit .csv
D Test Units - (not imported) used to understand limit values in columns H-K
E Offset - additional fixed offset, should be "0" (zero)
F Failing Soft Bin - Soft bin mapping for when test result exceeds tolerance limits (columns H and I) (in addition to other softbins mapped in the Test Exec)
G BCS Enable - "2" (two) FAIL for value and tolerance comparisons, "1" (one) FAIL for value only, "0" (zero) to disable any comparison (use standard limits)
H/I Lower/Upper CU Tolerance - if BCS Enable is "2", then FAIL if the value of the computed offset exceeds this lower/upper bound
J/K LowerLimit/UpperLimit - if BCS Enable is "1" or "2", then FAIL if the value of the measurement exceeds this lower/upper bound

